 Lab 5: Image Editing with the GIMP
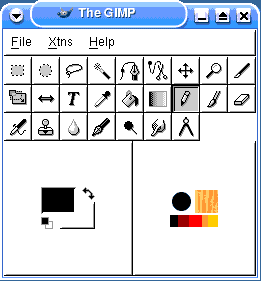
There are several image editing tools for Windows and Linux.
Today we will focus on the GIMP (GNU Image Manipulation Program).
The GIMP is a very powerful bitmap and vector graphics editor similar to
Adobe Photoshop and PaintShop Pro.
ImageMagick is much easier to use but its features are more limited.
Starting
- Click the K menu, move to Multimedia, move to Graphics, and click The
Gimp.
- If you are asked to configure The GIMP, just click OK or press Enter
several times.
- The tip of the day gives some helpful hints to get you started. Click
Close after reading a few tips.
Windows
- The ToolBox window has several tools for selecting, moving and modifying
images.
- Tool Options shows options for the currently selected tool.
- Brush Selection changes the size and shape of the brush for drawing
lines and curves.
- Layers, Channels & Paths shows the different layers in your image
and whether they are transparent.
Creating a New Image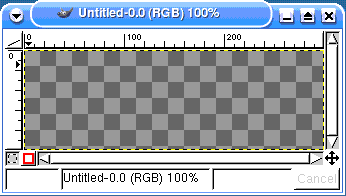
- Click File, New. Specify width 300, height 100, transparent. Click
OK.
- A window labeled Untitled appears. The checkered background indicates
that it is transparent.
- Right-click in that window, move to File, click Save As, and type
lastname
.xcf where lastname is your
last name.
Adding Text
- Double-click the Text tool (T in the Gimp window).
- Tick the Use Dynamic Text box. Click Close.
- Click in the image window. Select a font (e.g. indigo joker), style
and size.
- Type your name and preview it. The GNU Dynamic Text tool creates another
layer.
Selecting Colours
- Click the Gimp, Watercolor, Triangle and GTK selectors. Use colour
wheels, spectrums, sliders or hex values.
- Hue is the colour, saturation is the amount of a colour, and value
is the brightness or darkness.
- You can also choose RGB colour values. For web-safe colours, you can
type the hex triplet e.g. #ffcc99.
Adding a Brush Stroke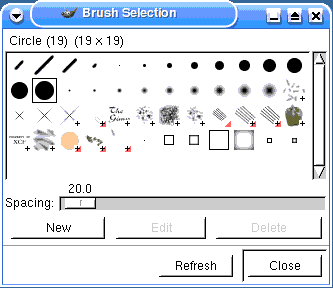
- Click the brush tool. Select a brush shape. Select a different colour.
- Click in the Background layer of the image in the Layers window.
- Underline your name with a brush stroke by dragging the mouse.
Moving Graphics
- Click the GDynText Layer in the Layers window.
- Click the Move tool (four arrows).
- Drag the text to reposition it to be on top of the brush stroke. Note
that different layers are moved independently.
- Click the Rotate tool.
- Drag the text to rotate it slightly and click Rotate.
Saving and Exporting
- Save your changes by pressing Ctrl-S.
- Right-click the image and select File, Save As. Type lastname.gif and
click Save.
- You will be asked to export the file by merging layers into one and
indexing the colours. Click Export.
- If you want to change the image further, you should open the .xcf file,
make changes, save and export again.
Photo Editing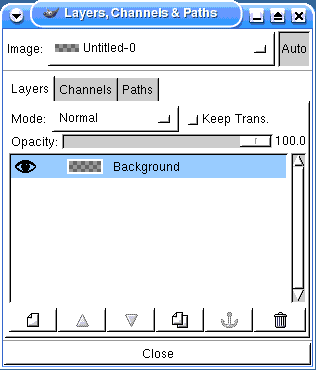
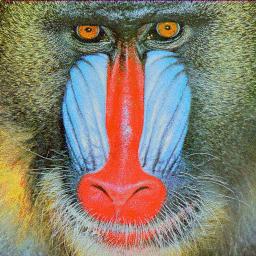
- Open mandrill.jpg or find another .jpg
photograph.
- e.g. type
find / -name *.jpg
-print
at the shell prompt, or use the find feature in your
file browser.
- Open it in the GIMP by choosing Open from the File menu.
- For the following steps, right-click the image and select the Image
menu.
- Choose Mode and click Grayscale. Click Undo. Choose Mode again and
select Indexed.
- Select Use Custom Palette, select Web to see the 216 colours, click
Close and click OK. This makes a web-safe image.
- Choose Colors. Try options for Color Balance, Hue/Saturation, Brightness/Contrast,
Curves, Invert and Posterize.
- Choose Transforms. Try rotating 90, 180, and 270 degrees.
- Choose Canvas Size. Type different numbers for width and height.
- Notice the size of the image within the canvas does not change.
- Choose Scale Image. Change the width and height.
- The image size changes. If the width:height ratio is changed, the
image is distorted.
E-Mailing as an Attachment
- If necessary, copy the lastname.gif and mandrill.jpg photo files to
a floppy disk and transfer it to a networked computer with e-mail access.
- Send the files as e-mail attachments in one message to the lecturer with subject line web lab
5.